

Moisture Problems in Your Glue Down Vinyl Flooring Project? How to Choose the Right Moisture Barrier Solution
When it comes to installing glue down vinyl flooring, one of the most critical yet often overlooked steps is checking the moisture levels in your substrate. Whether you’re working on a concrete slab or a screeded surface, excess moisture can cause adhesive failure, warping, bubbling, and a shortened floors lifespan.
That’s why understanding your site’s environment to see if you do need a moisture barrier is essential whenever you’re laying glue down vinyl flooring. By properly testing and treating your substrate, you protect your investment and ensure a flawless installation. If ever in doubt, use a moisture barrier.
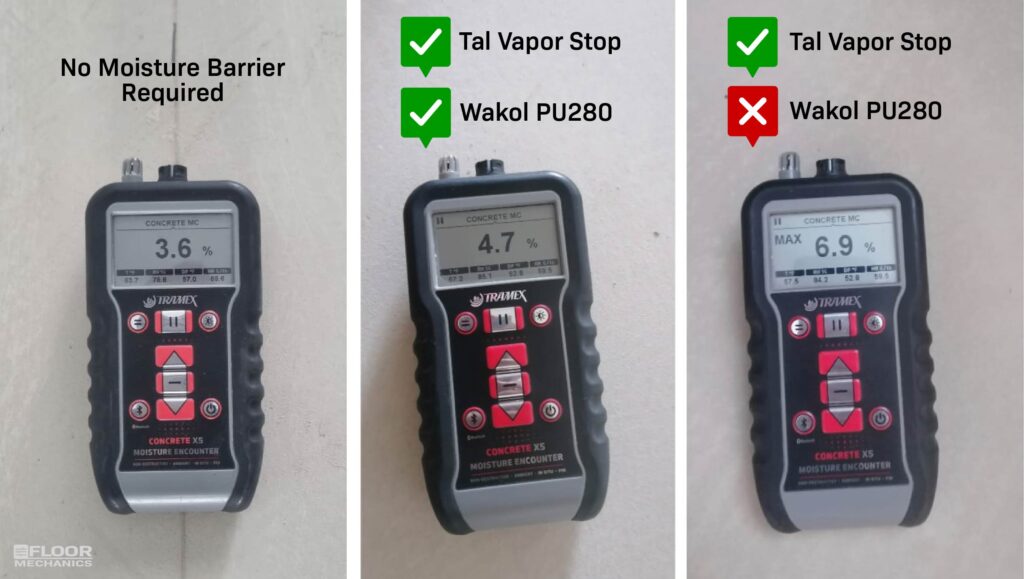
Why Moisture Testing Is Non-Negotiable
Concrete and screed naturally release moisture as they cure. If you install flooring before the substrate has reached safe moisture levels, the trapped moisture will migrate into the adhesive and the vinyl, creating major problems down the line.
We also often see moisture issues resulting from poorly sealed windows and doors (the infamous sliding door problem), and through ingress from leaking pipes or standing water on external walls. This really comes to the fore in the rainy season, when even the most robust sliding door gets pushed to its breaking point.
The rule of thumb:
- Below 4 CM% (carbide method) → moisture is considered manageable.
- Above 4 CM% → you need a stronger system to block high vapour emissions.
This is where the right moisture barrier system comes in.

Our Two Go-To Moisture Barrier Products
We recommend two trusted solutions for moisture protection under glue down vinyl flooring:
1. Wakol PU 280 – For Moisture Levels Above 4 CM% and Below 6 CM%
Wakol PU 280 is a high-performance polyurethane primer that acts as both a moisture barrier and a bonding agent. If applied with one coat it can be highly valuable to strengthen a screed and block against interactions with old adhesives and is suitable for a moisture reading of up to 4.5 CM%. Anything higher yet under 6 CM% will require two coats.
How to Apply Wakol PU 280:
- Prepare the substrate by grinding or vacuuming to remove dust and contaminants.
- Apply two coats Wakol PU 280 evenly using a roller or brush, each coat at right angles to each other. You can stop at one coat for moisture levels below 4.5 CM%.
- Allow it to dry (usually 40–60 minutes depending on site conditions).
- Once cured, you still need to apply a slurry coat before you screed, so that you ensure a chemical bond with the screed.
Key Benefits of Wakol PU 280:
- Blocks residual moisture up between 4 and 6 CM%.
- Enhances adhesive bond strength.
- Fast-drying and easy to apply.
- No further mixing required – just open and use.
- Transparent finish allows you to still see the substrate surface.
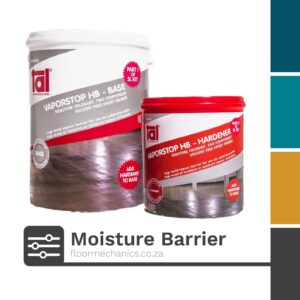
2. Tal VaporStop – For Moisture Levels Above 6 CM%
When substrate moisture is higher than 6 CM%, Tal VaporStop is our go-to solution. It’s a two-part epoxy-based moisture barrier designed for heavy-duty performance and is a fail-safe solution for ANY level of moisture. As a rule of thumb, apply one coat at 250micron for new builds or residual moisture issues related thereto. Apply two coats for moisture issues on existing builds or where you are dealing with variable moisture issues.
How to Apply Tal VaporStop:
- Ensure substrate is sound, clean, and free from laitance or weak spots.
- Mix components thoroughly (Tal VaporStop is a two-part system combined with Tal Primer Aggregate #2, a refined aggregate sand, as a third component).
- Get your setup organised as you will need to work quickly applying the product due to pot life of the product of about 30 minutes.
- Apply the first coat at the required thickness using a heavy-duty squeegee, working evenly across the floor. Allow the product to sufficiently cure, about one day. Skip to the next step if only one coat is being applied.
- Apply the second coat as before, and disperse Tal Primer Aggregate #2 across the surface, which provides a mechanical key for the screed at a rate of approximately 200 to 250g/m2.
- Once cured sufficiently for screeding (usually one day), remove the excess sand and the surface is then ready for a self-levelling compound or adhesive. No slurry is required.
Key Benefits of Tal VaporStop:
- Handles high moisture levels above 4 CM%.
- Creates an impermeable epoxy barrier against rising damp.
- Extremely durable and chemical-resistant.
- Suitable for areas with ongoing high vapour pressure.
- Using a refined aggregate like Tal Primer Aggregate #2 provides a mechanical key for the screed which is stronger than only a chemical key.
- Number one solution to keep your tight deadline on track when moisture issues arise.
Choosing the Right Moisture Barrier
- If your moisture readings are between 4 and 6 CM% → Wakol PU 280 is fast, efficient, and cost-effective.
- If your readings are above 4 CM% → Tal VaporStop gives you the peace of mind of a heavy-duty epoxy system.
Final Thoughts
Skipping moisture testing before installing glue down vinyl flooring is a gamble that can cost you in repairs, callbacks, and unhappy clients. By testing your substrate and choosing the right moisture barrier—whether Wakol PU 280 for lower readings or Tal VaporStop for higher ones—you set the foundation for a long-lasting, beautiful vinyl flooring installation.
Disclaimer: always refer to the manufacturer’s technical specifications and application documentation as your reference.

